
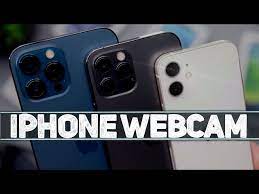
Are you tired of the same old video conferencing experience? Ready to take your virtual meetings to the next level? Look no further than your trusty iPhone.
With its sleek design and advanced technology, your iPhone can be transformed into a powerful webcam, elevating your video conferencing game with ease. But how exactly does it work? What apps should you use? And how can you optimize video and audio quality for crystal-clear virtual meetings?
In this discussion, we’ll explore the ins and outs of using your iPhone as a webcam, providing you with a step-by-step guide, troubleshooting tips, and even some advanced tricks to maximize your iPhone’s webcam capabilities.
Get ready to upgrade your video conferencing experience like never before.
Benefits of Using Your Iphone as a Webcam
Using your iPhone as a webcam offers numerous advantages for seamless and convenient video conferencing.
One of the biggest benefits is the high-quality camera that comes with the iPhone. The camera on the iPhone is known for its exceptional image and video quality, which means that you can enjoy clear and sharp video during your video conferences. This is especially important when you want to make a good impression or when you need to showcase important visual content.
Another advantage of using your iPhone as a webcam is the portability it offers. Your iPhone is a device that you carry with you everywhere, making it incredibly convenient for impromptu video conferences or when you’re on the go. You don’t have to worry about setting up a separate webcam or carrying additional equipment. Simply use your iPhone and you’re ready to go.
Furthermore, using your iPhone as a webcam allows you to take advantage of the various video conferencing apps available. Many video conferencing apps have specific features and functionalities that are optimized for the iPhone. This means that you can make use of features such as screen sharing, virtual backgrounds, and interactive whiteboards, enhancing the overall video conferencing experience.
Choosing the Right App for Iphone Webcam Functionality
To maximize the functionality of your iPhone as a webcam, it’s essential to choose the right app that suits your video conferencing needs. With numerous options available in the App Store, selecting the perfect app can be overwhelming. However, considering a few key factors can help you make an informed decision.
Firstly, compatibility is crucial. Ensure that the app you choose is compatible with your iPhone model and operating system. It’s important to check if the app supports both Windows and Mac computers, as this will allow you to connect seamlessly with various devices.
Secondly, look for apps that offer a range of features to enhance your video conferencing experience. Some apps provide options for adjusting video quality, adding filters, and controlling microphone volume. Others may offer virtual backgrounds or the ability to record your video calls. Consider the features that are most important to you and choose an app that meets your requirements.
Lastly, don’t forget to read reviews and ratings from other users. This will give you insight into the app’s performance, reliability, and user-friendliness. Look for apps that have positive feedback and high ratings to ensure a smooth and hassle-free experience.
Setting up Your Iphone as a Webcam: Step-By-Step Guide
Set up your iPhone as a webcam by following these step-by-step instructions.
First, make sure you have the necessary apps installed on both your iPhone and your computer. There are several apps available that allow you to use your iPhone as a webcam, such as EpocCam, iCam, and iVCam. Choose the one that best suits your needs and download it from the App Store.
Next, connect your iPhone to your computer using a USB cable or through Wi-Fi. If you’re using a USB cable, simply plug it into both devices. If you prefer to connect via Wi-Fi, make sure both your iPhone and computer are connected to the same Wi-Fi network.
Once your devices are connected, open the webcam app on your iPhone and follow the on-screen instructions to set it up. Typically, this involves granting the necessary permissions and adjusting the video settings to your preference.
Optimizing Video Quality for Professional Video Conferencing
To ensure clear video quality for professional video conferencing, there are a few key points to consider.
First, make sure you have adequate lighting to avoid grainy or dim footage.
Next, position your iPhone camera at eye level to maintain a professional appearance.
Lastly, adjust the resolution settings on your device to optimize the video quality for a crisp and clear image.
Lighting for Clear Video
For optimal video quality during professional video conferencing, consider optimizing your lighting setup. Good lighting is essential to ensure clear and well-lit video footage during your video calls.
To achieve this, make sure to position yourself facing a source of natural light, such as a window, to provide even lighting on your face. Avoid having bright lights or windows behind you, as this can create a silhouette effect and make it difficult for others to see you clearly.
Additionally, you can use artificial lighting options, such as a ring light or desk lamp, to provide additional illumination if natural light isn’t available or insufficient. Experiment with different lighting setups to find the one that works best for you and enhances your professional appearance during video conferences.
Camera Placement Tips
When it comes to optimizing video quality for professional video conferencing, one important aspect to consider is the placement of your camera. The position of your camera can greatly impact the overall video quality and the impression you make during video meetings.
To ensure the best results, position your camera at eye level or slightly above. This will create a more natural and flattering angle, avoiding unflattering shots from below. Additionally, make sure to position the camera at a distance that allows your face to fill most of the frame, without cutting off the top of your head.
Experiment with different angles and distances to find the optimal placement that provides a clear and professional view for all participants. Remember, a well-placed camera can greatly enhance your video conferencing experience.
Adjusting Resolution Settings
Adjusting the resolution settings on your iPhone is essential for optimizing video quality during professional video conferencing.
To ensure a clear and crisp image, start by going to the Settings app on your iPhone and selecting the Camera option.
From there, tap on the Record Video or Record Slo-mo option, depending on your preference. You’ll see a list of resolution options, ranging from 720p to 4K.
For the best video conferencing experience, it’s recommended to select a resolution of at least 1080p.
Keep in mind that higher resolutions may require more storage space, so make sure you have enough available.
Enhancing Audio for Crystal-Clear Virtual Meetings
To achieve crystal-clear audio in your virtual meetings, consider implementing these tips and techniques.
First and foremost, make sure you’re in a quiet environment with minimal background noise. Find a secluded space where you can avoid distractions and interruptions.
Next, invest in a good quality microphone. While the built-in microphone on your iPhone can work, an external microphone will greatly enhance the audio quality. There are many affordable options available that can plug directly into your iPhone’s Lightning port or connect via Bluetooth. Additionally, position the microphone close to your mouth to capture clear and focused audio.
Another tip is to use headphones or earphones with a built-in microphone. This will help eliminate echo and feedback during your virtual meetings.
Lastly, consider using a noise-canceling app or software. These tools can help reduce background noise and enhance voice clarity.
With these techniques, you can ensure that your audio is crystal-clear and your virtual meetings are professional and effective.
Troubleshooting Common Issues When Using Iphone as a Webcam
Now let’s address some common issues that may arise when using your iPhone as a webcam.
One of the most common issues is a poor connection or laggy video. To troubleshoot this, make sure you have a stable internet connection and aren’t using too many bandwidth-heavy apps or devices at the same time. Additionally, check if there are any software updates available for your iPhone and the webcam app you’re using, as these updates often include performance improvements.
Another common issue is a blurry or out-of-focus image. To fix this, clean the lens of your iPhone’s camera and ensure that it isn’t obstructed by any dirt or fingerprints. You can also try adjusting the focus settings in the webcam app you’re using.
If you’re experiencing audio problems, such as static or low volume, check if the microphone on your iPhone is obstructed or if there are any software updates available for the webcam app. You can also try using a separate microphone to see if that improves the audio quality.
Lastly, if you’re encountering any compatibility issues with your computer or the video conferencing platform, make sure that both your iPhone and the app you’re using are up to date and compatible with your device and operating system.
Advanced Tips and Tricks for Maximizing Your Iphone’s Webcam Capabilities
Now that you’ve mastered the basics of using your iPhone as a webcam, it’s time to take things to the next level with some advanced tips and tricks.
One important aspect to consider is lighting techniques, as they can greatly enhance the clarity of your video.
Additionally, don’t forget to optimize your video settings to ensure the best possible quality for your video conferencing sessions.
Lighting Techniques for Clarity
For enhanced clarity and optimal video quality, utilize advanced lighting techniques to maximize your iPhone’s webcam capabilities. Lighting plays a crucial role in video conferencing, as it can greatly impact the clarity and visibility of your image.
To ensure that you’re well-lit and easily seen by others, consider the following tips.
First, position yourself facing a natural light source, such as a window, to take advantage of the soft and even lighting it provides.
If natural light isn’t available, use a combination of ambient and artificial light sources to eliminate shadows and ensure even illumination.
Additionally, avoid harsh overhead lighting or backlighting, as these can create unflattering shadows or wash out your features.
Optimizing Video Settings
To optimize your iPhone’s webcam capabilities, you can fine-tune the video settings for enhanced clarity and quality. Adjusting these settings will ensure that you have the best possible video conferencing experience.
Start by accessing the settings menu on your iPhone and selecting the ‘Camera’ option. From there, you can make adjustments to the resolution, frame rate, and exposure settings. Increasing the resolution will result in a sharper image, while adjusting the frame rate can help reduce lag and motion blur. Additionally, adjusting the exposure settings can help you achieve a well-balanced image, especially in different lighting conditions.
Experiment with these settings to find the perfect combination for your video conferencing needs. Remember to test your settings before important meetings to ensure that everything is working optimally.
Comparing Iphone Webcam Options: Free Vs. Paid Apps
When comparing iPhone webcam options, consider whether to use free or paid apps.
While free apps may seem like an enticing option, it’s important to weigh the pros and cons before making a decision. Free apps typically have limited features and may come with advertisements, which can be distracting during video conferences. On the other hand, paid apps often offer a more comprehensive range of features and a smoother user experience.
Paid apps usually provide better video quality and offer advanced settings for customization. They also tend to have better customer support, which can be crucial if you encounter any issues while using the app. Additionally, paid apps often have regular updates and bug fixes, ensuring that you have access to the latest features and improvements.
However, it’s worth noting that there are some decent free options available as well. These apps may not have all the bells and whistles of paid apps, but they can still serve your basic webcam needs effectively. If you’re on a tight budget or have simple requirements, free apps could be a suitable choice.
Ultimately, the decision between free and paid iPhone webcam apps depends on your specific needs and budget. Consider the features, video quality, customer support, and overall user experience before making a choice. Remember, investing in a paid app can enhance your video conferencing game and elevate the professionalism of your virtual meetings.
Conclusion
In conclusion, using your iPhone as a webcam can greatly enhance your video conferencing experience. By choosing the right app and following a simple setup guide, you can optimize video quality and audio for professional virtual meetings.
Troubleshooting common issues and utilizing advanced tips and tricks can further maximize your iPhone’s webcam capabilities. Whether you choose a free or paid app, elevating your video conferencing game with your iPhone is now easier than ever.